


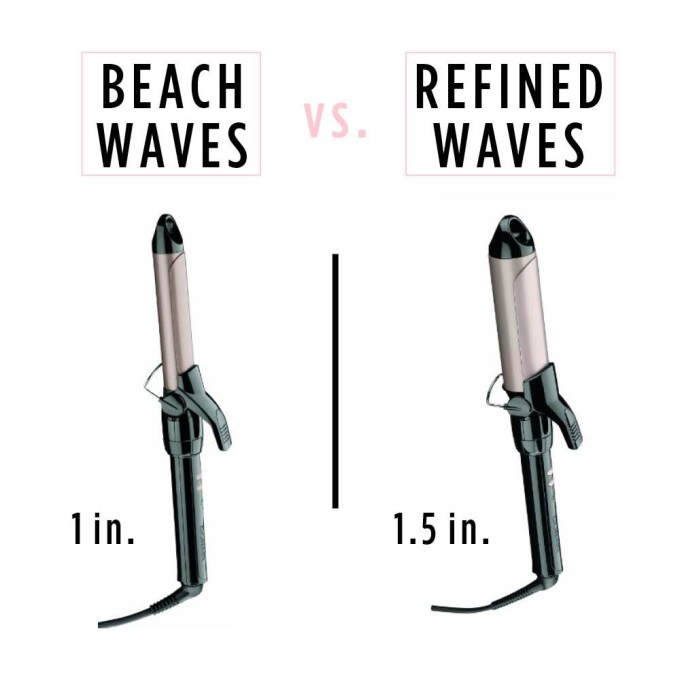
1 inch curling iron | 1.5 inch curling iron
Good morning, loves! I’ve had an overwhelming amount of requests for hair tutorials, so while I am working on putting one together, I thought I’d share a little bit about the one tool I use every single day: the curling iron. I have two go-to sizes that I use to achieve two completely different looks.
REFINED CURLS
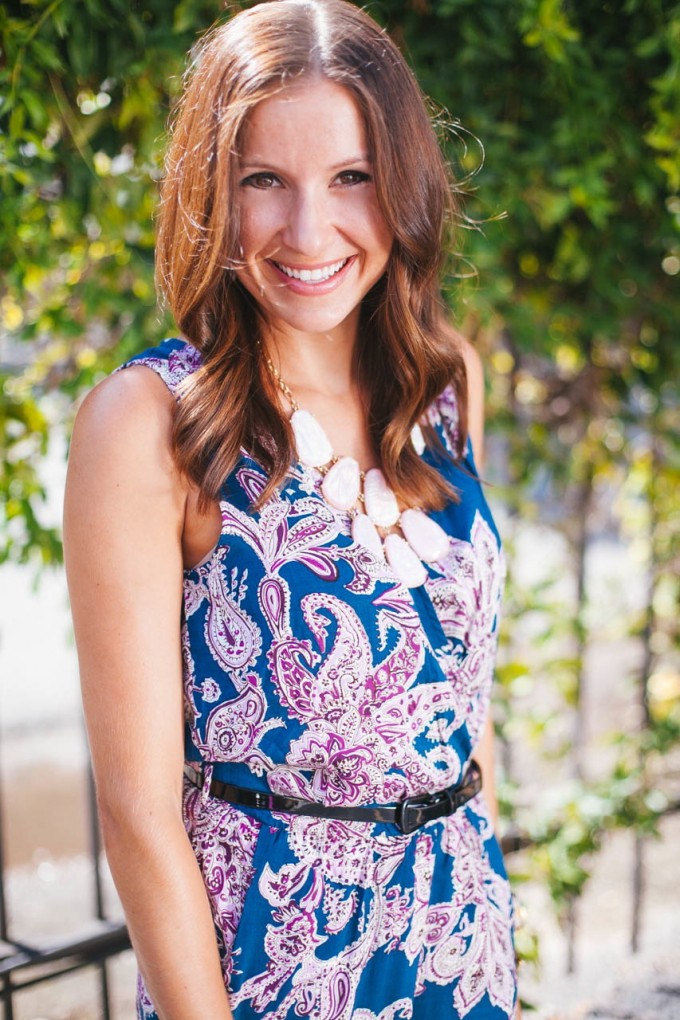
If you scroll back through my blog to some of my first posts, you’ll see that I had long hair that I often styled with refined curls. I loved this style because it was easy to do and often lasted for a couple of days. Learning to curl it properly took some time however, and most of my styling tips came from Whitney Haynes, my hair stylist at FORM Salon.
Steps to attain refined curls:
(Prior to curling, blow dry your hair with a round brush – this will smooth out your hair starting at the root and will give you some volume on the top of your head.)
- Section your hair length-wise into 1 inch pieces. You’ll start on one side of your head and work your way around. So, I just use my finger and touch the top of my head by my part, then bring my finger down to section my hair and create a 1 inch section. Then, I clip the bulk of my hair away from my face.
- Then divide this section into two halves – one on top and one on bottom.
- Grab one of your halves and your 1.5 inch curling iron.
- Place the curling iron half way down your section, clamp it, hold it for a couple of seconds and then twist in a little more hair, hold for a second, twist in a little more, and continue this until you have all of your hair (from your half-way starting point to the end of your section) wrapped in your curling iron. Then gradually pull the curling iron out.
- ALWAYS CURL AWAY FROM YOUR FACE.
- Continue with this method all the way around your head.
- Once you’re finished curling your hair, lightly mist your hair with hairspray.
- Allow the hairspray to sit for a couple of minutes and then use your fingers to pull out the curls.
- Finish styling by brushing through your curls to give a smooth look.
- Add a little more hairspray or styling product if you need it.
BEACH WAVES
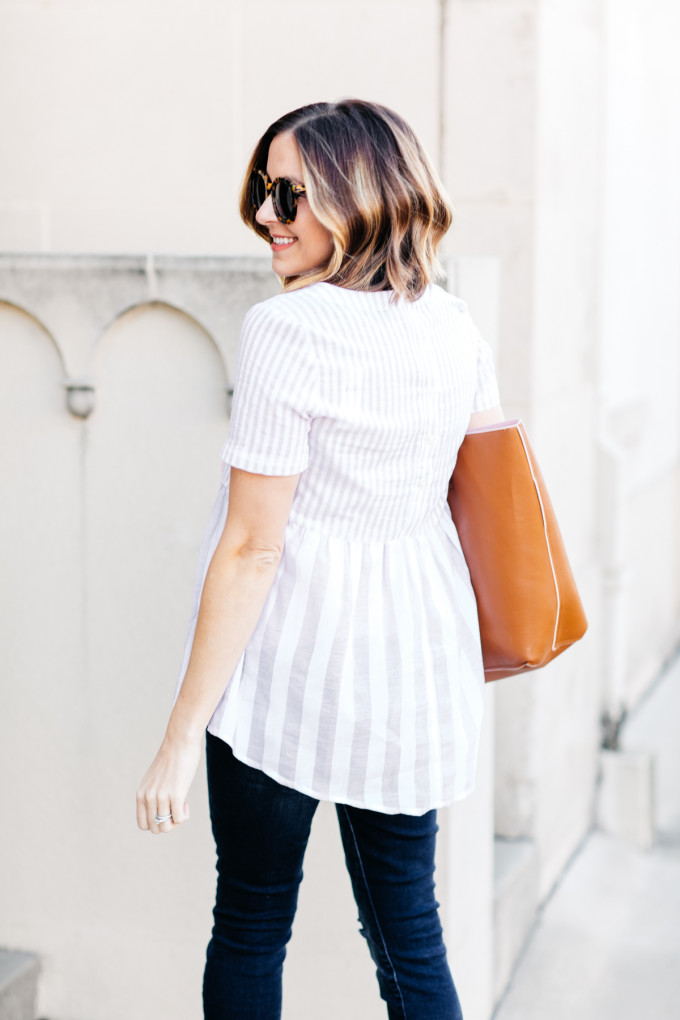
Although I loved having long hair, my hair stylist and I have finally agreed that shoulder length is probably the best for my face shape. So, after I gave birth to Abby we decided to part from the refined curls, cut some length off, and create a more effortless look. What I love about beach waves is that it really is effortless to do – it takes significantly less time to do and lasts multiple days!
Steps to attain beach waves:
(Prior to curling, power blow dry your hair – meaning, put your dryer on full blast and just use your fingers to get your hair dry)
- I tend to have little baby hairs near my face that curl up no matter how I dry my hair, so I use a mini flat iron to smooth out those individual pieces that wont lay smoothly.
- Just like you did above, section your hair length-wise into 1 inch pieces. You’ll start on one side of your head and work your way around. So, I just use my finger and touch the top of my head by my part, then bring my finger down to section my hair and create a 1 inch section. Then, I clip the bulk of my hair away from my face.
- Then divide this section into two halves – one on top and one on bottom.
- Grab one of your halves and your 1.5 inch curling iron.
- Then, take curling iron and place it half way down your section of hair and clamp it down and curl it away from your face. Note: the difference here is that you’ll leave about 1-2 inches of your hair sticking out of the bottom. So, essentially, you’re only adding a bit of curl to the middle of your hair section.
- Continue the above step all the way around your head until it’s all curled.
- Spray your hair and let it sit for a couple of minutes.
- Then, use your hands to pull out the curl. Feel free to use a straightener to flatten out any pieces that have really curled up. You want it to look like a wave, not a curl.
- Use texturizing spray to separate and texturize your hair and then finish off with some hairspray.
I hope this can help some as I work on a video tutorial. Please let me know via the comments or email if you have any questions or if there’s something in particular you’d like to see in the future! Hope you’re all having a fabulous day!!!
Thanks for reading!!
xx – anna


